Friday, November 16, 2012

Literary Conflict


It can often be difficult to teach about literary conflicts with elementary students.  I don't just mean "what is Johnny's problem in the story," but rather the causes, effects, and changes due to conflicts.  To be honest, I don't think I fully grasped the concept until high school; however, I have found a way to help my students begin to dissect conflicts that they read about and experience.   

When it boils down to it, every conflict comes from one or more of the following perspectives: religious, political/power, psychological, economic, social, technological, philosophical, and cultural.  Even the youngest of students have experienced these things (the power conflict of different bedtimes, the economic conflict of not getting the candy bar at the store, the social conflict of disagreeing with friends). 


One of my graduate professors actually shared these 8 perspectives with me and I now use them to classify all conflicts with my students.  Even though the vocabulary is a bit sophisticated, the pictures remind students that these perspectives are always in play.  Plus, the kids get a kick out of learning college-level material! 

Try using these perpectives with your students, or even just reminding yourself of these perspectives when you come across conflict in your life.  There are always different perspectives being challenged . . .

Get a free download of my Literary Conflict Perspectives Posters!  It is a free google.doc in PDF format.

Thursday, November 1, 2012

Character Dress Up Day

I was the White Witch from the Chronicles of Narnia for this year's Character Dress Up Day!


I just thought I would show you all how OCD I am for costumes, too!

I made my crown from an old tiara, dental floss and Christmas tree icicles.  I wore my sister's old prom dress which was white lace . . . covered with a handmade cape from leftover wedding fabric.

It was great to show off my work at our school's dress up day (held on Halloween - if you can't beat 'em, join 'em!).


Wednesday, October 31, 2012

Grades Poster

Here is a poster I have near my student mailboxes.  It explicitly shows my grading scale. 


Also, make note that a "check plus" is not the highest homework grade in my class.  A perfect score on homework is a "plus."  This system allows me to represent the full spectrum of grades (A through F) for short homework assignments. 

I find that this poster helps all of my students accurately judge their work.  It eliminates questions and confusion.  I even find myself referring to it when converting percentages to letter grades.

Sunday, October 14, 2012

Bookmarks

Do you ever use a paper cutter to trim projects?  Are you left with tons of strips of colored paper? Put them to use as bookmarks!


I have a cardboard box sitting near the classroom library that I constantly fill with pre-made and recycled bookmarks.  My students are free to take as many as they need. 

One of my library rules is to use a bookmark (instead of folding over page corners!) and this box is just the right size to hold hundreds of bookmarks.

What a great way to recycle simple paper scraps into something useful!


Tuesday, October 2, 2012

I Need to Use the Bathroom!

Here is my bathroom sign-out system:


This station is near my student tracker board so that as students sign-out, they can show it on the board. The sign-out station includes a cup of pens to use, a digital clock (so my students don't stand in the middle of the room trying to read the wall clock), sign-out charts for boys and girls, and even nurse passes.


I made simple charts within word documents so students record what times they leave and return to the classroom.  In addition to logging where students are, the charts help me figure out who may be missing math lessons every day to go to the bathroom!   More than a few times, I have used these charts to determine students who are anxious about a particular subject or time of day.

One of the many sneaky ways teachers figure things out . . .


Tuesday, September 18, 2012

5th Grade! Now Starring...

To welcome my new stars in September, here is my beginning of the year bulletin board.


The red title was cut with my school's die-cut machine and laminated.  I keep the letters in a plastic bag so they are ready to use each year.  The small yellow stars are cut out of construction paper and have each student's name on them.  They are, after all, the upcoming superstars of the year.The red and silver stars are cut from glittery craft foam and tied on with ribbon.

After spending some time together as a new class, I like to have students write something on the back of their star that they are a superstar at.  Many students choose a sport or activity they are successful at.  Then, we place the stars back up on the board.  Students take turns reading our superstar talents and guessing who they belong to.  We can check the answers by looking at the names on the back of the stars. It's a great way to start things off on a positive note!


Sunday, September 9, 2012

Writing Center

My writing center contains absolutely EVERYTHING my students need for all steps in the writing process.  It is an integral station in our classroom.


The top shelf is home to blank index cards for making flashcards, writing prompts to get ideas flowing, pens, pencils, highlighters, tape, a stapler, electric pencil sharpener, and group cups containing scissors and rulers.  The lower shelf has rhyming poetry dictionaries, scissors, handheld pencil sharpeners, a three-hole punch, lined scrap paper, and white scrap paper.  The lined scrap paper was pulled from old notebooks that students donated at the end of previous years.  The white scrap paper is from worksheets and paperwork that was only printed on one side.  It's a great way to recycle and have paper for drafting, sketching, drawing, and math computations.


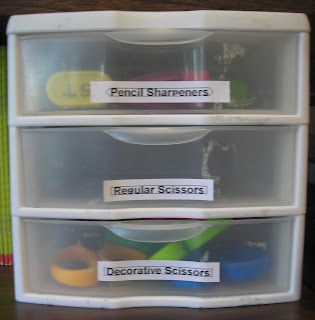
These plastic drawers contain labeled sections for handheld sharpeners, regular scissors, and decorative-edged scissors.  The labels serve two purposes: they give me an excuse to use my favorite label maker and students always know where to return the supplies!


Since the electric pencil sharpener can only be used during the morning routine, recess, and at the end of the day, we have sharpened pencils ready to go.  I made these two containers by covering coffee cans with construction paper.  The "Ready!" bin is home to pencils that are sharp and ready to use.  The "Need to be sharpened" can is for students to place dull pencils to be sharpened later.  A student helps with sharpening so I can focus on other things (what student doesn't love to use an electric sharpener?).  If students absolutely need to sharpen a pencil during the day, they simply use one of the quiet, handheld sharpeners.  


The cart of dictionaries is directly next to the other writing supplies.  The cart has various dictionaries and thesauruses as well as binders of graphic organizers and writing prompts.  The bottom left side of the shelf is reserved for other books that help with the writing process.  

Now, if only these writing resources could help me grade papers, we'd be in business!


Monday, August 27, 2012

Keeping Track of the Writing Process

Here is my writing process number wall:


These posters and numbers are hung near my writing center (pens, pencils, dictionaries, prompts, six traits posters, etc.) so everything is all in one area.  This wall allows me to visually keep track of where each student is in the writing process.  The numbers are held on with sticky tak.  As students move through the process, they move their number to the appropriate section.


Students move from the initial planning process to draft writing at the beginning of the writing process.


Then, as students are working on their drafts, they move their numbers to the revising/proofreading/editing section.  I put these process steps together because, let's be honest, we often do all three simultaneously as we are working.


The final writing process steps are publishing and sharing.  I remind students that we don't always have the time or capacity to share every piece of writing, especially short assignments.  So, sometimes students move from publishing back to the planning step without sharing.  

Download your free Writing Process Posters here!  It is a google document in pdf format.


Saturday, August 18, 2012

How are you getting home?

In order to keep track of how each student gets home after school, I've made a simple chart and had it laminated. 


Once the chart is hung on the wall near the door, I use overhead markers to write student names in the boxes.  Using erasable markers allows me to move student names as needed when schedules change.  This chart can be used year after year.  It is also an important tool for substitutes and classroom helpers to refer to. 

Download a free pdf of Transportation Chart!  It is google document in pdf format. 


Friday, August 17, 2012

Gradebook

Don't waste money on a store-bought gradebook when you can make your own cute gradebook that can be used year after year.


This one-inch binder was a dollar store find (of course).


My grade book is comprised of class lists and 8 tabs for keeping things in order.  I always have extra class lists up front and ready to go . . . these help for keeping track of grades, recording responses, organizing groups, etc. 


I have the following tabs in my gradebook to keep everything organized:
  • READ = reading grades
  • ELA = English language arts grades (spelling and writing)
  • SCIENCE (2 sections) = science grades
  • MATH = math grades
  • C.C. = Common Core checklists
  • SCHEDULES = district calendar, grading term dates, specialist schedule, etc.
  • LISTS = class lists, school lists, peanut safe snack lists, etc.

What I love most about using a binder for grades?  I can add whatever I need!  I can include school paperwork, calendars, extra tabs, and anything else I find helpful.  It's customizable and cute. 


Thursday, August 16, 2012

Hanging Baskets

This hanging basket is in its third life!  It started as a kitchen tool for holding fruit, then it housed my Beanie Baby collection in elementary school, and now it's an organizational tool in my classroom . . . hung from the ceiling, it's a great alternative to bookshelves.


I use the hanging basket as a catch-all for fun things in my classroom.  I use it to store extra stuffed animals (we read with them), shower loofahs (used as balls for tossing games), and large foam dice (for class math games).  Best benefit of this basket?  It keeps these fun items out of reach of my students so they're not tempted to play with them during class. 

I'm sure that every teacher could think of ways to use these baskets for extra storage!


Tuesday, August 14, 2012

The Deli

Do your students shout for help across the classroom?  Do they get out of order as they are waiting for help?  Have them take a number!


I used an extra set of numbers from a class calendar to make our deli system.  Just like in the supermarket, students "take a number" when they need my help.  Then then head back to their seats to work while they wait.  When their number is called, it's their turn to be helped!

Love it! :)


Monday, August 13, 2012

The Best Ball for Tossing Games

Just plain shower loofahs?  Think again!!!  These are the greatest "balls" to use for classroom tossing games.


I use these loofahs to toss with my students for fun games, review sessions, and time fillers.  They're perfect because no one can get hurt by them . . . they're also easy to catch for small hands. 

To make a shower loofah into a ball, just cut off or tuck in the strap.  To make it even easier to catch, fluff it up a little bit.

Kids think they're the greatest thing ever to play with!

Friday, August 10, 2012

Common Core ELA Grade 5 Checklists

STUDENT CHECKLISTS:

I created these checklists to keep track of student progress on each of the ELA standards for Common Core. 


These checklists are for all strands of the ELA standards: language, literature, informational text, writing, reading foundations, and speaking and listening. 


The checklists have spaces for student names as well as corresponding boxes to keep track of student mastery.  When a student meets a particular standard, write the date in the matching box.  This helps you document student progress. 


The checklists can be very long (specifically the writing checklist), so I glued them together - see the first picture.  In order to fit the large checklists in my grading binder, I folded each list to fit. 


Get a free download of my Common Core ELA Grade 5 Student Checklist!  It is a free google.doc in PDF format.


TEACHER LISTS:
This checklist is for teachers to correlate the new Common Core ELA Grade 5 Standards to their current textbook and curriculum series. 


This checklist includes already prepared columns with the Common Core ELA standards - one column with the official language, one with more common language.  There are also two additional columns for you to write the corresponding chapters or sections in your current textbook and other activities/projects/worksheets that you use.  This chart is a fantastic way to organize your current materials to work for the Common Core standards.

Get a free download of my Common Core ELA Grade 5 Teacher Checklist!  It is a free google.doc in PDF format. 

Also take a look at my MATH checklists!


Common Core MATH Grade 5 Checklists

STUDENT CHECKLISTS:

I created these checklists to keep track of student progress on each of the MATH standards for Common Core.  These checklists are for all strands of the MATH standards: operations and algebraic thinking, number and operations in base ten, number and operations - fractions, the number system, measurement and data, and geometry. 


The checklists have spaces for student names as well as corresponding boxes to keep track of student mastery.  When a student meets a particular standard, write the date in the matching box.  This helps you document student progress.  If needed, to fit the large checklists in my grading binder, I glued multiple pages together and folded each list to fit. 

Get a free download of my Common Core MATH Grade 5 Student Checklist!  It is a free google.doc in PDF format.


TEACHER LISTS:
This checklist is for teachers to correlate the new Common Core MATH Grade 5 Standards to their current textbook and curriculum series. 


This checklist includes already prepared columns with the Common Core MATH standards - one column with the official language, one with more common language.  There are also two additional columns for you to write the corresponding chapters or sections in your current textbook and other activities/projects/worksheets that you use.  This chart is a fantastic way to organize your current materials to work for the Common Core standards.

Get a free download of my Common Core MATH Grade 5 Teacher Checklist!  It is a free google.doc in PDF format. 

Also check out my ELA checklists

Class Mascots

Want a fun way to start the year off as a team?  Vote on a class mascot!

Every year, I have the students vote on an animal as our classroom mascot.  I only have one rule: it must start with the letter T.  It turns into my first lesson on alliteration.  Then we try to come up with a slogan as well.  They're tied to learning and usually include a play on words.

Here are the past two years' mascots:

"We can learn and toucan, too!"

"We're spinning webs of skills and talents!"

I can't wait to see what this year's class votes on . . . I'm hoping it will be the TIGERS :)


Thursday, August 9, 2012

Scholastic Book Order

Here are my materials all ready for my Scholastic book orders:


I have a pocket folder (that I got free from one of my first orders) to keep extra book flyers organized.  I also have an accordion file to hold things like order forms, payments, coupons, envelopes, etc.  Again, I got this with one of my first orders; however, a coupon accordion file would work great!

My favorite OCD preparation for book orders?  My envelopes!  I use the sticky address labels that come with every order form to prepare envelopes for future orders.  Each envelope is ready with my return address, payment slip ripped off, and my customer order number already written in.  This way, all I have to do is insert the checks, write the amount, and drop it in the mail.

When I send my book orders home, I include a short note like this one:

My notes have information about the due date, online ordering instructions, and a reminder that online orders earn free books for our classroom. 

Don't forget to get the kids and parents excited about book orders.  Here is a fabulous Scholastic video that I have posted on my classroom website for all my families to view:


Check out the website for Scholastic Book Clubs site to get started. 


Tuesday, August 7, 2012

Photo Frames with a Purpose

Here's another Pinterest project . . .

I found two cheap picture frames that another teacher was throwing away (*gasp!*) and turned them into great additions to my desk!


A piece of scrap paper - in neon pink of course - turns one of the frames into a cute whiteboard.  Instead of wasting tons of sticky notes, I just use a dry-erase marker to make notes to myself. 


A printout of my student names turns the second frame into a dry-erase class list. 


I can cross out names as students hand in assignments, answer questions, etc.  When I'm done, I can just erase and start over! 


The best part about this project?  It literally took 5 minutes to make . . . and now I'm thinking of other uses for cheap picture frames.


Monday, August 6, 2012

The New Hall Pass

My very first Pinterest project!  I got the idea from a pin on a friend's board.  I was able to turn an old cookie sheet (which another teacher was throwing out) into a great board to keep track of where my students are. 


After painting the cookie sheet and spraying it with a clear coat, I decorated sections with headings for: in the room, nurse, library, boys bathroom, girls bathroom, office, and specialist.  You could add any spaces that your students usually frequent to your own board. 

Next I glued numbers I printed from my computer onto glass craft beads.  After trimming off the excess paper, I added a magnet to each one. 

When all the numbers are at the top of the board, I know all students are in the classroom.  When students leave for any reason, they move their number to the correct space.  This lets me know where students are, even when things get hectic. 


Like I said, I got the idea from Pinterest (my most exciting, organized, and time-wasting website of the moment).  Here is the original project! with more detailed how-to instructions. 

Saturday, August 4, 2012

Copies & Grading

I have to admit that when I was a child, I loved to pretend to be a teacher with my stuffed animals.  When I moved on to using my sister and younger neighbors as my students, I thought the greatest thing was to grade and put stickers on their papers!  I also remember helping my dad grade some of his students' high school science exams . . . I bet they were surprised to receive smiley face stickers on their tests!  

Now, as I am well into my teaching career, I'm not sure why I thought it would be so exciting to grade papers.  It's one of my least favorite parts of teaching! 

In order to help organize my papers and make my life just a bit easier, I came up with a great system.  I got a 3-Tier Mesh Organizer from a local Tag Sale (a.k.a. yard sale or garage sale) for a few bucks.  I set it on its side on a filing cabinet.  As soon as I added some well-placed labels, it was ready to go!


What is great about this shelving system is that it's easy and accessible for my classroom helpers.  I have a shared paraprofessional who often has some extra moments to help with grading or copying.  This filing system is in an easy-to-reach place and even has my copying code for her to use.  An organizational system like this would be great for parent volunteers as well. 

The top shelf is where I place items that need to be copied.  I also use Small Post-It Notes on the pages to label how many copies I need and any other special instructions.  That way, no one has to wonder what I have planned in my head.

The second shelf is where I put papers and assignments that need to be corrected.  If there is an answer key, I paper clip it to the sheets.  To be completely honest, some papers stay hidden on this shelf for w-a-y too long . . .

The bottom shelf is where I put things that I hope to work on.  It is sort of a miscellaneous shelf for things I hope to read, things to laminate, projects to try, and activities to prepare.  Again, some things collect dust on this shelf . . . but it's better than collecting dust on my desk, right???

Friday, August 3, 2012

Classroom Library

"I can't find a book!"

Every teacher dreads hearing this from a student.  I have found a way to bring order to the chaos of my hundreds of books.  The best part is, I no longer hear that dreaded phrase. 

My secret weapons?  Plastic bins from the dollar store, recycled cardboard boxes, a lot of dedication, The Classroom Booksource website, and lots of time to put it all together. 

This portion of the library hosts genre bins for genres like comics, realistic fiction, mystery, science fiction, historical fiction, and fantasy.  I actually have 3 whole bins for fantasy - obviously it's our favorite genre. 

This side of my library consists mainly of reading series like Percy Jackson, Inkheart, Septimus Heap, Flat Stanley, and Narnia.  There are also bins for well-known authors like Gary Paulsen, Patricia MacLachlan, Judy Blume, and Beverly Cleary.  There are leveled book bins on this side as well.  These books are labeled using guided reading level letters.  Once students find books at their comfort level, they can utilize these bins for similarly matched books. 

Newbery winners and honor books are kept in these large plastic bins with room for yearly additions.  I recommend that my students try reading at least some of these classics. 

No space in my library is left unused.  I have used various shallow plastic bins (all from the dollar store) for groups of books and magazines stored beneath the large book shelf. 

This is my new favorite bin!  I began with a cardboard box that housed paper coffee cups and covered it with construction paper.  I got the circular sign free with a Scholastic book order and I taped it to the top of the cardboard box.  Once I added a label, it was done!

My library is my baby (can you tell?) and I'm so proud to share it.  It's been a few years of working out the kinks, but I'm in a place where I'm so happy with how things are organized.  I can honestly say that every container was either free (recycled cardboard boxes) or just $1 (yes, every plastic bin is from the dollar store - some even came in groups of 3 for a dollar).  What could be better?  That means I can spend my money buying books instead of containers. 

The Classroom Booksource website was my newest addition to my library protocol.  This summer, I spent hours cataloging every book in my library onto this FREE website.  This website also allowed me to document which bin each book belongs in.  The O.C.D. side of me fell in love with this website at first sight!  Even though many of my coworkers think I'm crazy for spending so much time with this process, I know that it was the right choice for me.  It will help me (and my students) keep track of my books - which total over 650 as of right now!  A place for every book, and every book in its place . . .

Now that you know how everything is organized, it's time to talk about what this means for my students.  First of all, my students find the book bins to be important tools to choosing well-fitting books.  Students know that if they love a genre, they can find books in it.  If they love a series, they know where to look.  If they want a particular level, there's a bin for it.  Once they find the perfect book, checking out books is a two step process: 
  1. Students find their name on The Classroom Booksource website.  They search for the book they are checking out, and mark that they have it. (They also return books on the websie
  2. Students use their numbered clothespins to clip to the bin where they took a book from.  Three clothespins = three books can be out at a time. 
This side wall of the library is where students use personalized clothespins to check out books. 

The clothespins (in addition to being budget-friendly) serve a dual purpose.  They help me visually see how many books each student is reading (a missing pin means a book is checked out).  The pins also help my students remember where to book their books back.  They clip the pin on the bin where they got the book.  When it's time to return a book, they find the pin with their number to return a book to it's home. 

Another benefit of the clothespins?  I can see what genres or series my students are reading.  This helps me order more books that correlate to what the kids truly enjoy. 

Students who forget where to return their books or have ripped books, place their books in this "medical box."  The classroom librarians determine if the books should simply be returned to their rightful place or if they should give them to me for repairs. 

Is this already too crazy for you to wrap your mind around?  Well, I take it even further . . . hello, OCD teacher here!  Inside each book cover is helpful information for both me and my students.  Book information listed includes the book's genres (a star indicates the book bin), guided reading level (letter), and lexile level (number).  These labels help everyone find appropriate books - be it by level or genre.  How empowering for students to pick up a book, flip to the back cover, and be able to decide if it may be a worthwhile choice for themselves! 


Whew!  So that's my classroom library.  I'm sweating just thinking about everything it took to get it to this point.  I also am looking back over this post realizing that I'm like that proud parent talking about every little cute detail.  What can I say?  This project really is my baby :)